As I was flipping through “Fall Decor” ideas on Pinterest recently, I ran across this:

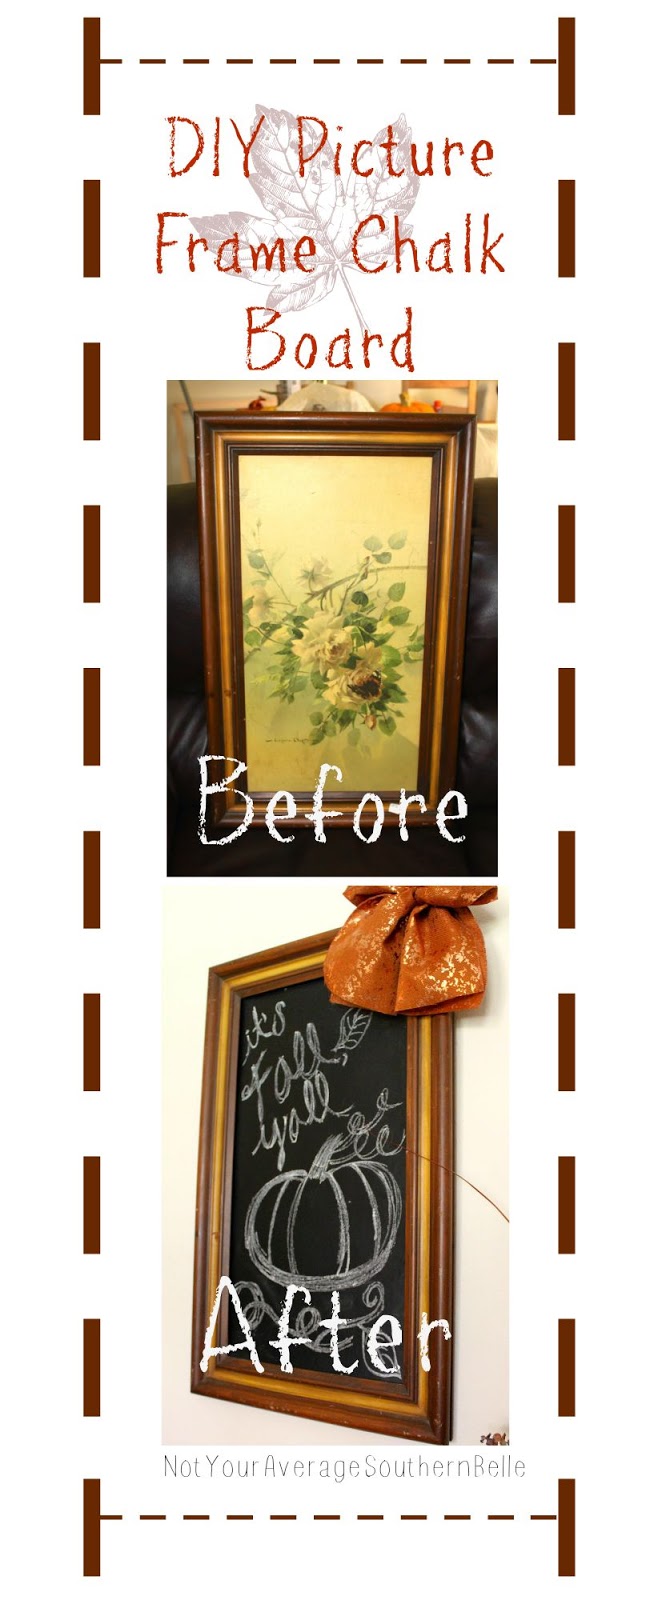
I instantly fell in love with everything in this photo, but one thing stuck out in particular… The framed chalkboard! It was very rustic looking, and chalkboards are so in right now, so why not give it a try? I found a couple of these, retailing well over $50. But why would I buy one when I can just make it? Which is exactly what I did

I knew my favorite re-sale store always carries a ton of old layered frames that would be perfect.

True to their style, they had one for a great price. This is the same store that does the 50% off the color of the day thing, yesterday’s color was yellow and this frame had a yellow sticker on it! SCORE!
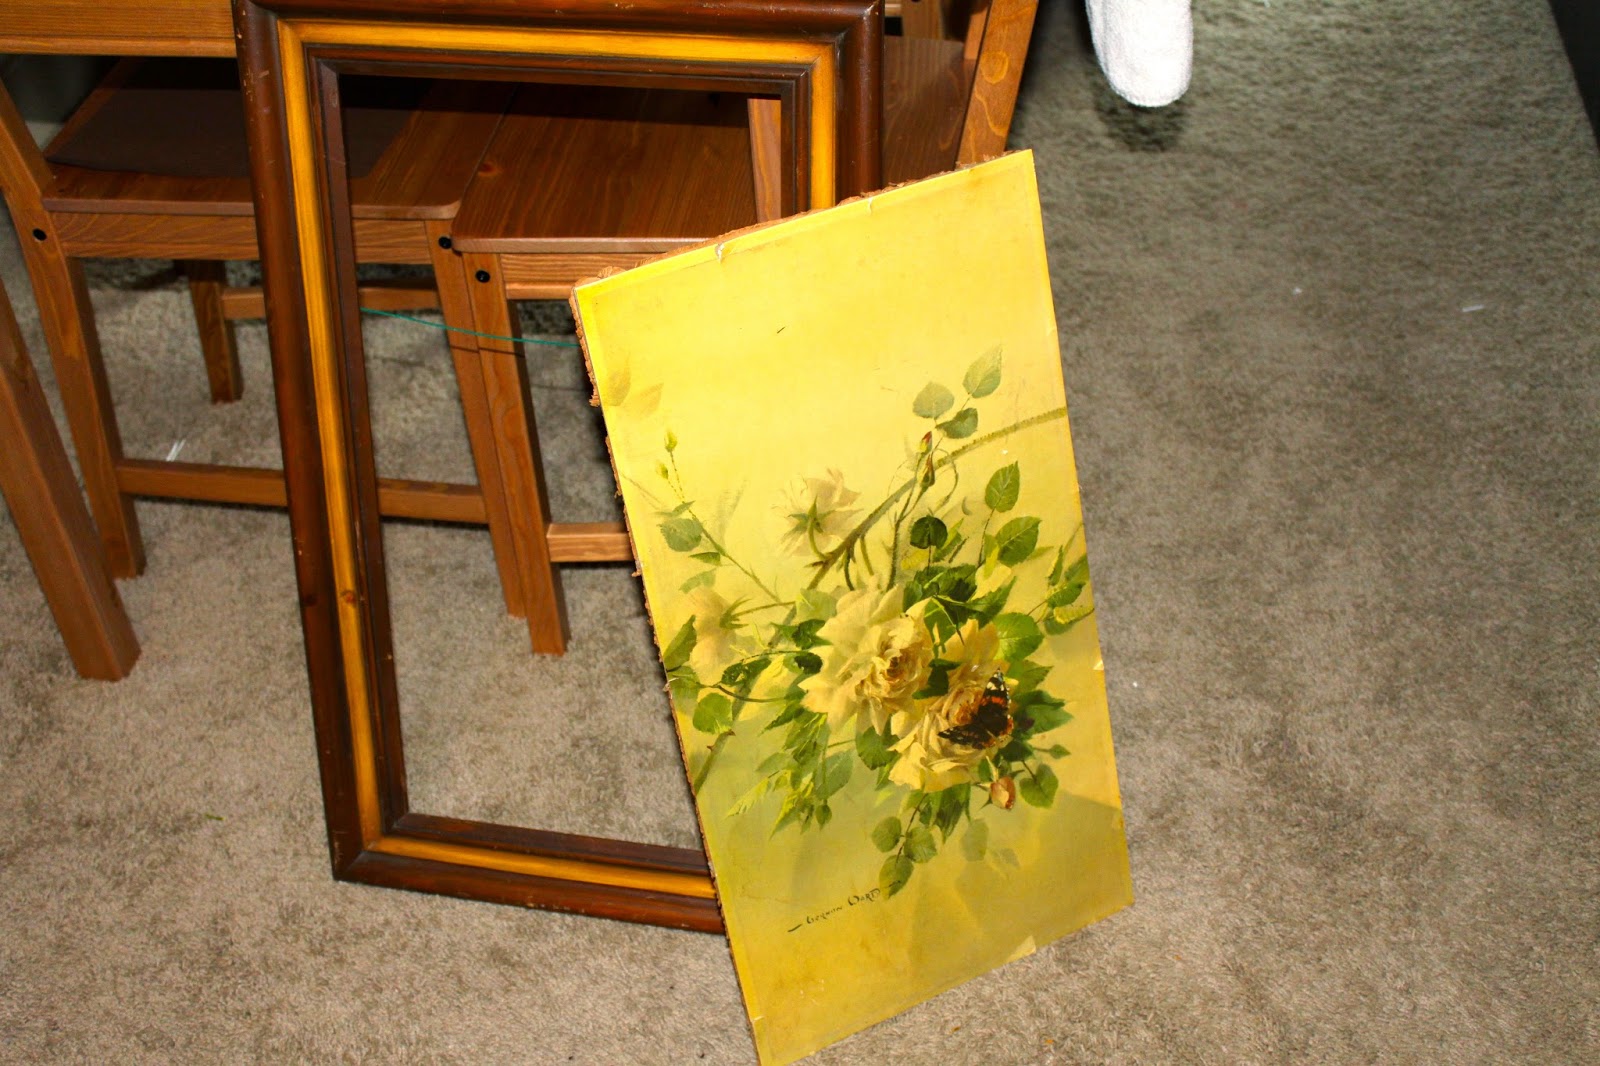
Much like any other pre-assembled frame, the backing is one large sheet. Just like the Picture frames I recently up cycled, I had to cut out the actually picture in order to be able to separate it from the frame. Easy-peasey, I’m a pro at this!
Now, for the really easy part. Spray painting over the picture! So many people have confused chalk paint with chalkboard paint. They’re two separate things, not to be confused. I went with this Krylon Chalkboard Paint from Michael’s, which, with my 40% off coupon, was just under $4

I always use a drop cloth when spray painting anything, not just because I know my apartments would kick my ass dislike it greatly if I got paint on their patio, but because it makes all aspects of clean up so much easier!

In order to get the newly done chalkboard, aka the old picture secured into the frame, I slid it back in to place and added hot glue around all sides. This kept it in place perfectly! And I’ll never really need to take the chalkboard out again, so hot gluing was the perfect option.


I wanted to used chalkboard markers, but thought the actual chalk might add a little more of a rustic feel. Due to my fear of failure, I drew it first with a pencil on the chalkboard and then went over it with chalk.

Since I decided to start on my fall decorating to properly assess what I was still in need of, this went straight up on the wall. The entire process took less than 24 hours (drying included), and cost me less than $10, sounds pretty great to me!

Do you have any DIY fall decor ideas? Or a fall decorating tip? I’m all ears!
XoXo-Tiffani